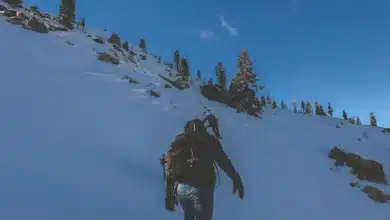
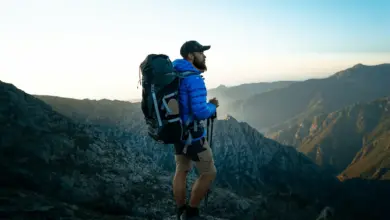
Experiencing fantastic scenery in a different light is one of the main reasons so many people are drawn to hiking. The views are constantly changing, and even the same trails look completely different as the seasons change. Many hikers take a camera to help capture the scenery and record their experiences. If you’re hoping to recreate what you see with your eyes with your camera, you probably own or have considered buying a tripod.
If you asked a professional landscape photographer for one tip, there is a good chance the answer would be to use a tripod. They help reduce camera shake and, importantly, slow you down so you can think about the composition.
You might also Like: Best Power Drill For Ice Auger
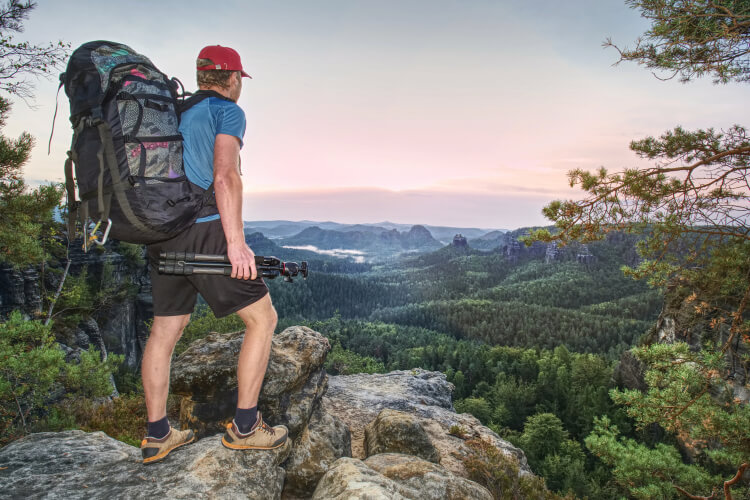
The problem with hiking with a tripod is they are often long bulky and awkward to carry. That’s fine if you’re photographing people in a studio, but not if you’re hiking long distances over difficult terrain.
All is not lost though. There are ways to make carrying your tripod on the trail much easier. We have gone through the best options for carrying a tripod, so you can concentrate on enjoying the scenery.
1. Use Tripod Straps
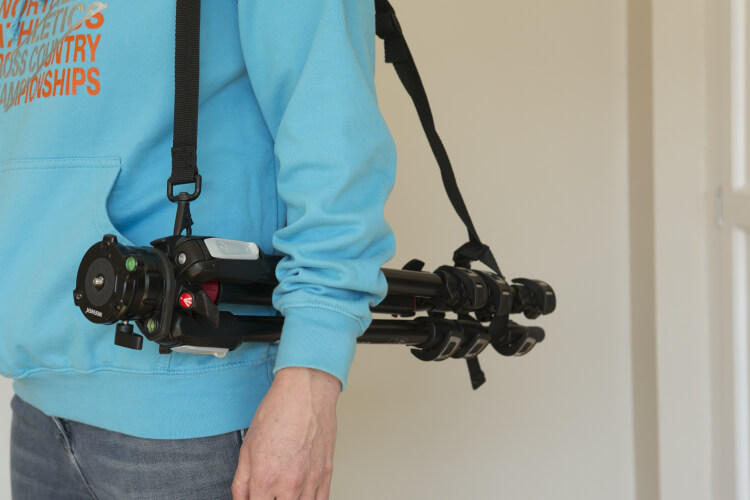
The first stop for most people looking to carry a tripod is a tripod strap. There are lots of different design options, but the idea is to have a strap that attaches to the tripod at both ends. This creates a sling that you then put over your shoulder or, if you loosen the strap enough, you can also put it around your head. It’s a simple concept, but as you’re carrying the weight on your shoulder it’s important that it’s well designed.
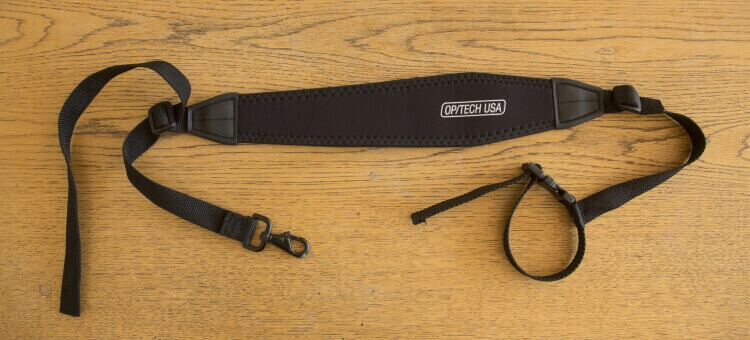
Perhaps the most well-known brand with a focus in this area is Optech. Optech offers different models and a range of different options for connecting the tripod to the strap. This is really helpful. With most tripods, you will attach the strap by looping around the top and bottom of the tripod.
Thankfully, there is an increasing number of tripods such as the popular Manfrotto 190 that have a number of fittings at the top. These can be easily hooked into and released quickly with the Optech Swivel version.
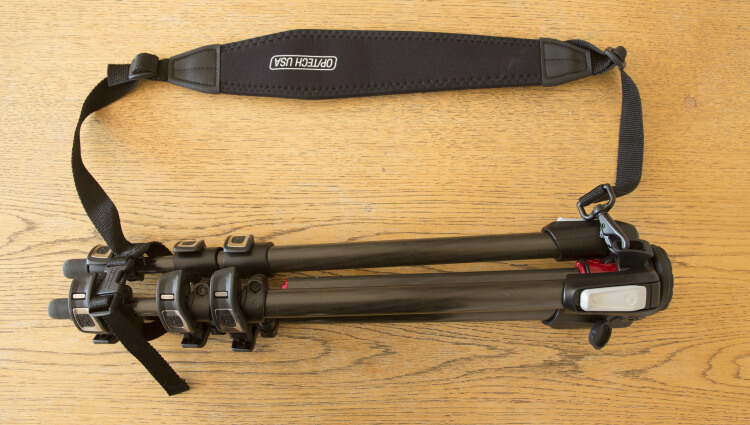
Optech’s video shows some of the options for connecting the strap It”s worth noting that there has been an increase in the types of fitting you might find on tripods since the video was made. The part of the strap that touches your shoulder is padded and comfortable. It’s also very durable and should withstand many years of hiking.
One product that offers a solution to this is the MindShift Gear Tripod Suspension Kit. This works on a balance system with extra support around your neck. While it doesn’t solve the issue of the tripod moving around, the balance does feel quite natural.
The other thing to note with straps is that there isn’t any real protection. It’s quite easy to find the tripod banging into things as you’re carrying it behind you. There is definitely the possibility of some scratches and scrapes while hiking if you’re not careful.
Straps are inexpensive, light and get the tripod out of your hands. If you’re willing to take some time on the fitting they can be a great option.
2. Attach it to you Pack
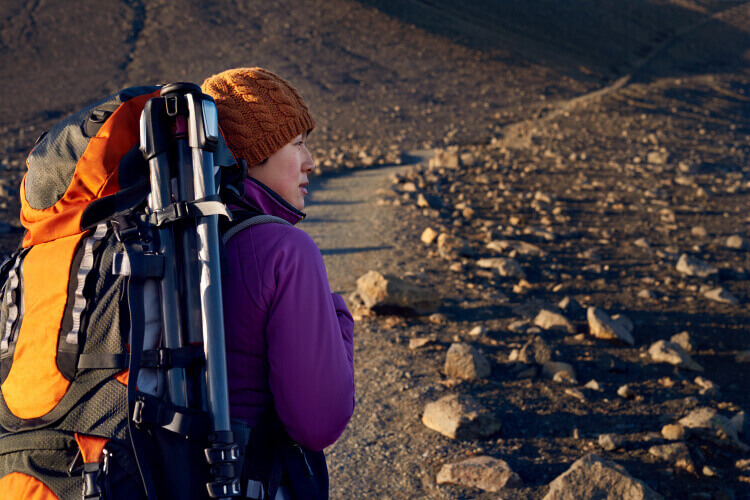
You can avoid carrying the tripod separately by attaching it to your pack. This is a good method if you want to keep your hands free for trekking poles.
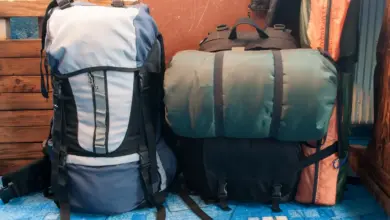
There are is a huge range of photography backpacks and many of these offer a way to attach a tripod directly to the bag. When looking at the size and style of the bag, it’s important to consider both the size of your tripod as well as anything else you might need to put inside.
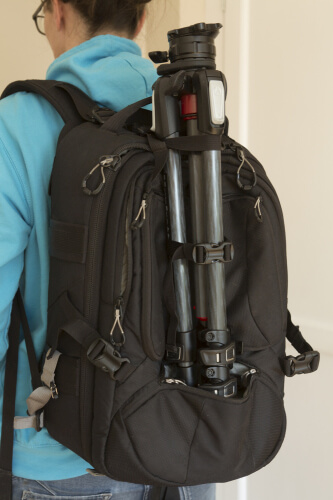
While many backpacks attach the tripod on the side, the Tamrac Slim Anvil has it placed in the center. This helps with balance and it’s also useful having as it will often be the first thing that you want to remove when setting up a shot.
The Anvil has lots of areas of support and the weight distribution is excellent, making it a great way to carry a small or medium size tripod. As with many models, a rain cover is included and extremely useful for when the weather changes. You may, however, find that if the tripod is long and sticks out the top, the rain cover won’t stretch over it. The best option here would be to buy a specific rain cover for the tripod.
Vanguard, like Tamrac, has a very good reputation for making quality bags. They have a very strong model in the Vanguard Alta Sky 51D where the bottom of the tripod inserts into a pocket pouch on the Tamrac. The Alta Sky has a specifically designed support cradle which folds out to create a brace for the legs.
Lowepro, a company that specializes in photography bags, has a similar brace concept on the Lowepro ProTactic range. All three of these bags offer support at the bottom of the tripod which not only stops the tripod from sliding down but keeps the weight in a position where it’s quite natural and simple to carry.
You may also like 3 Ways to Attach an Ice Axe to Your Pack
3. Get a Traveler Tripod
If the idea of carrying significantly more weight and bulk isn’t worth the trade-off, there are scaled-down alternatives. Smaller than standard tripods, traveler tripods come in many shapes and sizes.
The drawback is you’re likely to lose some stability as well as some of the height a standard tripod offers. To keep the weight down, traveler tripods have shorter legs and when these extend they are as tall. If you’re 6″7, you’re likely to find you’re crouching down a considerable amount.
It’s worth checking the maximum height on the model you’re looking at as well as the number of leg sections. The telescopic legs on tripods fold into each other and the general rule of thumb is the less leg section the more stable a tripod will be. However, this often means the shorter it will be too.
Keeping the weight down is a key element of travel tripods. Light and strong materials, such as carbon fiber, are noticeably more expensive than aluminum. There is often a big price increase for carbon fiber on a large tripod but is often worth the premium.
However, some traveler tripods are so small by design that often there is only a small difference between aluminum and carbon fiber as there isn’t a huge amount of it used. We would recommend checking the weight of both versions, and if there is little difference the aluminum could be a significant saving.
It’s also worth thinking about what camera you will be carrying. Generally speaking, the heavier the camera, the more sturdy the tripod needs to be. So if you’re packing a small mirrorless camera and a light lens, you can consider a smaller, lighter tripod than you would for a large DSLR.
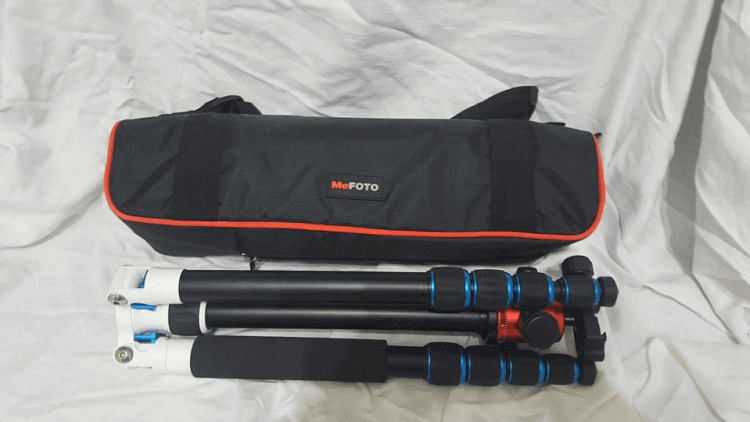
A good place to start with traveler tripods would be the MeFoto Classic. You can choose between aluminum or carbon and these are very portable and surprisingly sturdy. Slightly larger is the Vanguard VEO 2 235AB.
The Vanguard comes in different sizes and depending on the size of your backpack, you may be able to fit it straight in. The Vanguard also has a lot of the height coming from the legs which are useful for stability. When using a tripod, the part that is most susceptible to shaking is the center column. Ideally, you would try and get the maximum height by opening the legs and when more height is needed you would then use the center column.
The Benro Go Plus is another interesting small tripod. With this model, the center column can be moved into a horizontal position. If you have an interest in astrophotography this would be a model to consider. You also have the option of switching the feet to spiked feet which could give more of a grip on certain terrains.
You may also like One Trekking Pole or Two, Which Is Better?
4. Use a Mono Pod
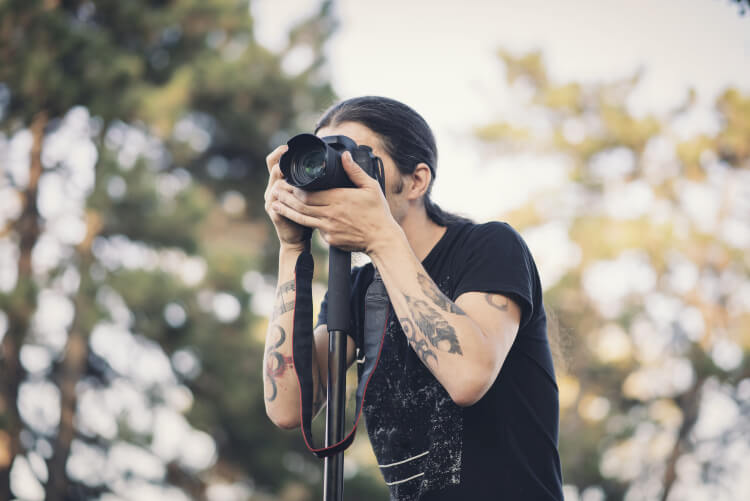
For stability, three legs are clearly better than one, but when you’re balancing the extra weight and portability, it’s not quite as clear cut. While monopods have only one leg, they do take the weight out of your hands. They still allow you to focus on working the camera and keeping it still. Another benefit is they fold away into a much smaller size and the weight difference is considerable.
Using a monopod is definitely more stable than holding a camera in your hands. But there is still human contact and those small movements can affect the sharpness of an image. Luckily, there are monopods with feet, and while they may not hold your camera up in gale force winds, they can hold a DSLR independently. This avoids the hand contact with the camera and reduces the chances of camera shake.
The Sirui SUP204SR uses feet for a platform. They can then turn backwards towards the monopod to reduce height when you’re carrying it. The folded length of monopods is usually longer than a tripod, but they are much lighter. The thin profile also means they can fit without issue on the side of the backpack.
If you’re happy to just use a monopod for some support without the need for it to stand independently, there are some very low cost, small and light options such as Manfrotto’s Compact Tripod. If you’re looking at hiking light and just need a little support, this would be a good option.
There is also an interesting cross over product. If you use trekking poles when hiking, there are products that double as both a monopod and a hiking pole. Novoflex has a nice range of these and both Leki and Manfrotto have products that can work as both. There is also a hiking handle made by Manfrotto that allows monopods to be quickly converted in hiking poles. If you currently use a hiking pole and are considering a monopod, one of these options could cover both bases.
You may also like The 5 Best Lock Laces For Camping
5. Consider a Mini Tripod
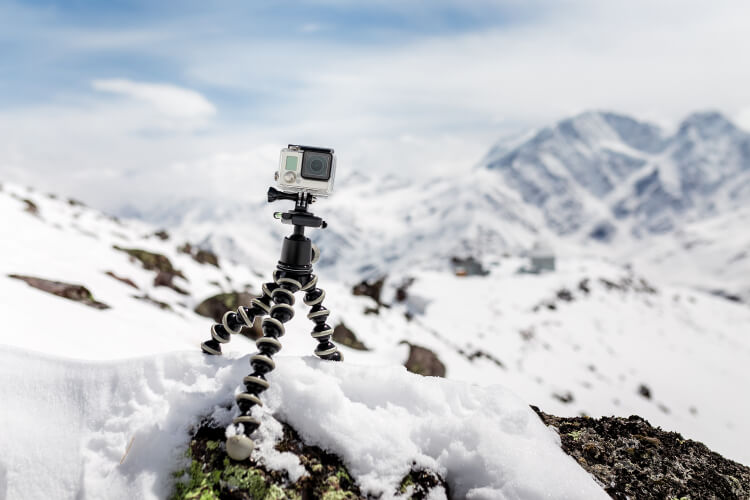
At the lightest end of the scale, there are some products so small you would hardly notice you’re carrying them. Gorilla Pods are mini tripods, and the more sturdy models can take the full weight of a DSLR. There are options suitable for different size cameras and these increase in size and bulk. Be sure to match your camera to the correct model to avoid carrying anything bigger than necessary. These are smaller than traveler tripods and in many cases could just be thrown into your pack.
The Gorilla Pod inspired a lot of innovation and new models, but the convenience and lightweight benefits don’t come without issues. As sturdy as they are, you are limited to shooting at either ground or the highest level you can find something to attach to. Some people will place them on top of their hiking bags, but that’s still a lot lower than eye level. Other options include rocks or tree branches, but you’re obviously limited by where you are and what you can find.
Other mini tripod models can be equally secure. Many mini tripods like the Manfrotto Pixi are even smaller and lighter than the Gorilla Pods. The problem here is that the straight legs mean you lose out on the ability to attach to branches or any uneven surfaces, which puts even more restrictions on shooting positions.
Out of all the mini tripods, the Gorilla Pods are the most suited to hiking. If you’re willing to spend some time looking for a decent place to attach it to, then they are a really useful tool. If you only need a tripod now and again, this is a way to carry one that won’t really impact your hike at all.
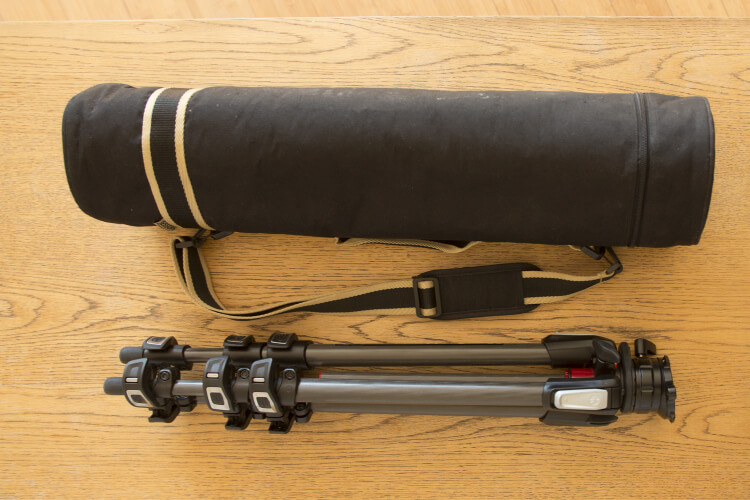
6. Tripod Bags
If you have invested in an expensive tripod, a lot of the options we have looked at don’t offer much in the way of protection. Whether aluminum or carbon fiber, if you pass trees and rocks regularly, it’s easy for the legs to become scraped.
There is a huge range of tripod bags on the market but there is a balance between protection and bulk. Some of the more expensive models have more padding but it can quickly become too heavy and difficult to carry. The lower-cost models like the Slik often have a good compromise between durability and size. There are lots of generic cheap models on the market and the fabric holds up well.
The main component that breaks is the zip, so try and choose one with a durable zip and a strap. You can carry them over your shoulder and use them in the same way you would a tripod strap. The difference is a bag that is bulkier but offers more protection. If you have spent a lot on your tripod this might be a route worth considering.
You may also like 6 Ways to Carry Cellphone When Hiking
7. DIY Route
If you’re willing to put the time in, there are plenty of DIY hacks that can help you save money and have a solution tailor-made to your tripod.
If you already have a hiker backpack, you can add some webbing tape and buckles and attach a tripod to the side of your pack as shown in this video.
Alternatively, if you have a small backpack with holes for lashings, you can attach a shock cord to your pack.
Many hikers actually prefer to use a hiking backpack and modify it for camera equipment rather than having a specific photography pack. It’s very easy and cost-effective to find a camera bag insert that fits your current pack. Camera bags can be fantastic but some are bulky in design without much thought for other items that you might take hiking. Modifying your existing pack might actually be the best way forward.
Many of the options for carrying a tripod doesn’t include a great deal of protection. One common trick is to use plumbers pipe insulation to cover the legs. This costs very little and will help reduce the metal from getting cold in winter months. The legs often flip open whichever way you carry your tripod and these can be secured with a bungee cord or a band without too much expense.
If the thought of a tripod strap looks appealing, you can make your own if you have an old camera strap. They are adjustable in the same way. While you might lose a little comfort from the padding, you will be saving a few dollars along the way. Finally, for waterproofing, you can buy general rain covers at a size big enough to include your packs and tripod or one specifically for your tripod. These are often less expensive than branded photography versions.
You may also like How to Attach and Use the Bungee Cord on Your Backpack
Final Word
Hauling your camera equipment hiking is not always fun. Smaller tripods, monopods, bigger bags, and innovative strap designs are all interesting options and offer different ways to solve the same problem. Which one is the answer for you depends on your camera, your tripod, and how frequently you want to use it and just how much weight you want to carry?
If you want to keep the weight and cost to a minimum, you can slowly start working through the DIY options or use e a mini tripod with a good looking tree branch.