Setting up a Winter Campsite
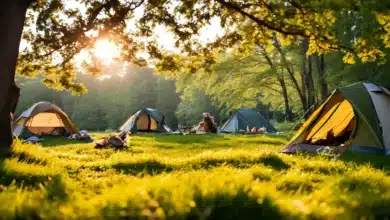
Setting up a Winter Campsite can be a fun process. But, before you do set up camp, you want to make sure you have found a good winter campsite location.
After you find a good location out of the wind and on level ground, the next important tasks are erecting tents, building a kitchen area, collecting firewood, and gathering water.
Steps for Setting up Your Tent Site
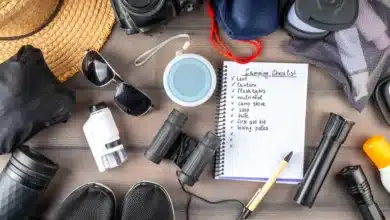
Before we get into the details, here’s a quick overview of tasks to set up your camp location:
- Find a good campsite location
- Pack down snow in and around your tent site
- Setup your tent
- Build a snow wall
- Build your kitchen area
- Gather firewood and water as needed
Depending on the type of camping and location, you might not need to do all these steps, especially if there isn’t a lot of snow.
How Do You Pitch a Tent in Snow?
Once you have found a location, the next step is to pitch your tent. Pitching your tent in the snow can be a little tricky.
Winter tents are usually more secure than 4 season tents, and it will be easier to set up your tent in winter if it’s a freestanding tent. This article describes other differences between 3 season and 4-season tents.
First, Pack down the Snow
The first step to pitching your tent is to pack down the snow. This can be done by walking the entire area with your skis, split board, or snowshoes, especially around the area where the tents will be.
Stomping down the snow will create an even surface that is level and less likely to melt. When you’re sleeping, having the snow melt under you from your body heat can create an uneven surface that will freeze later. If this happens, be sure to flatten the snow again before it freezes.
Packing down the snow makes it easier to walk so you don’t sink down into the snow (called post-holing). You might even want to make paths to your common areas and bathroom.
You may also like Do Sleeping Bag Liners Actually Work? And Which Ones?
Tying down Your Tent in Snow
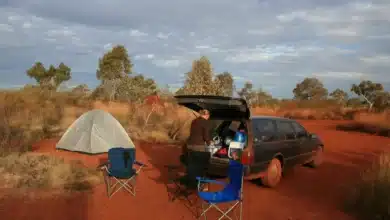
After the snow is packed down in your camping area, it’s time to set up the tents. The tent doors should be facing the central area, where the kitchen will be located. If there is a strong wind facing the doors, orientate the tent so that the door is at a right angle to the wind instead.
There’s usually no need for tent stakes in the winter. Instead, use your ski poles, ice axes, or fallen tree branches. One alternative to using a stake is to create a dead, which is to tie the stake line to a stick and bury the stick in the snow. The snow will harden around the stick making the line secure.
MSR actually sells sand and snow anchors to help tie down your tent. They are little “bags” that can hold rocks, sand, or snow. You can check out the stake kit on Amazon.
If the wind becomes a problem, consider building a snow wall around the tent to protect it from the wind. Make the snow wall as high as it needs to be to get the job done. Snow saws and snow shovels for backpacking are great for this task.
PS – If you’re looking for a guide on picking out a good snow shovel, check out our illustrated guide to snow shovels.
When building the wall, have someone on the inside of the tent push at the tent walls to prevent the snow from collapsing onto the tent. Once the snow hardens, it will provide extra insulation, making it even warmer on the cold nights.
If you want more tips for keeping your tent warm in winter, check out our 27 Tips for staying warm.
Building a Snow Kitchen

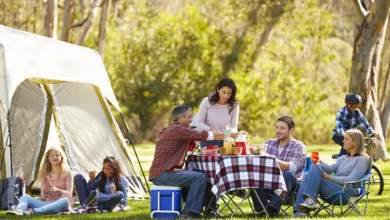
As the tents are being set up, other members of the group can start building the snow kitchen. The kitchen area will be the central area of the camp. This is where you will eat and cook meals, relax, warm up, socialize, fix equipment, and go over the next day’s adventures.
To build a kitchen area, you’ll want to dig a big round pit about 2-3 feet deep. For a group of 4-6 people, the pit should be 6-8 feet in diameter. If you have a larger group, build a larger pit.
When building the pit, pile the snow on the outside of the pit. When the pit is complete, pack the piled snow down around the outside until it’s firm.
With the pit finished, use your shovel and snow saw to make benches. Snowshoes and skis can be used as backrests. The rest of the snow can now be carved into tables and counters to store food and cooking equipment.
If you are using a stove, you can build a cooking area with a windscreen. Having tables at chest or waist high can prevent you from having to constantly bend over, which can be convenient.
The fire pit should be built in the center of the pit. The walls around the pit will help hold the heat and make it nice and toasty.
You may also like How to Prevent and Treat Frostbite When Hiking
Conclusion
When finding a place to camp in the snow and setting up your tent, you’ll first need to find a good location. This means your tent should be out of the wind, in a safe location from falling branches and avalanches, and preferably in the sun.
Once you find a good location, pack down the snow for your tent and make paths to the common areas. Pitching your tent in snow will most likely require some deadweight anchors to help secure your tent. Once your tent is secured, move on to creating the kitchen area.